Building a Complex Scene
Hint
For a better understanding, it is recommended to first read the chapter Creating a Robot Configuration.
If several robot parts of a scene shall be linked together (e.g. the right arm of a Yaskawa Motoman SDA10D and the Weiss Robotics WSG-50 Gripper), you have to adapt the Parent link in the Properties bar belonging to the corresponding robot part (e.g. the WSG-50).
Example (see Fig. 12.1):
Robot part: wsg50 mount
Parent link: arm_right_link_tool0 (Motoman SDA10D)
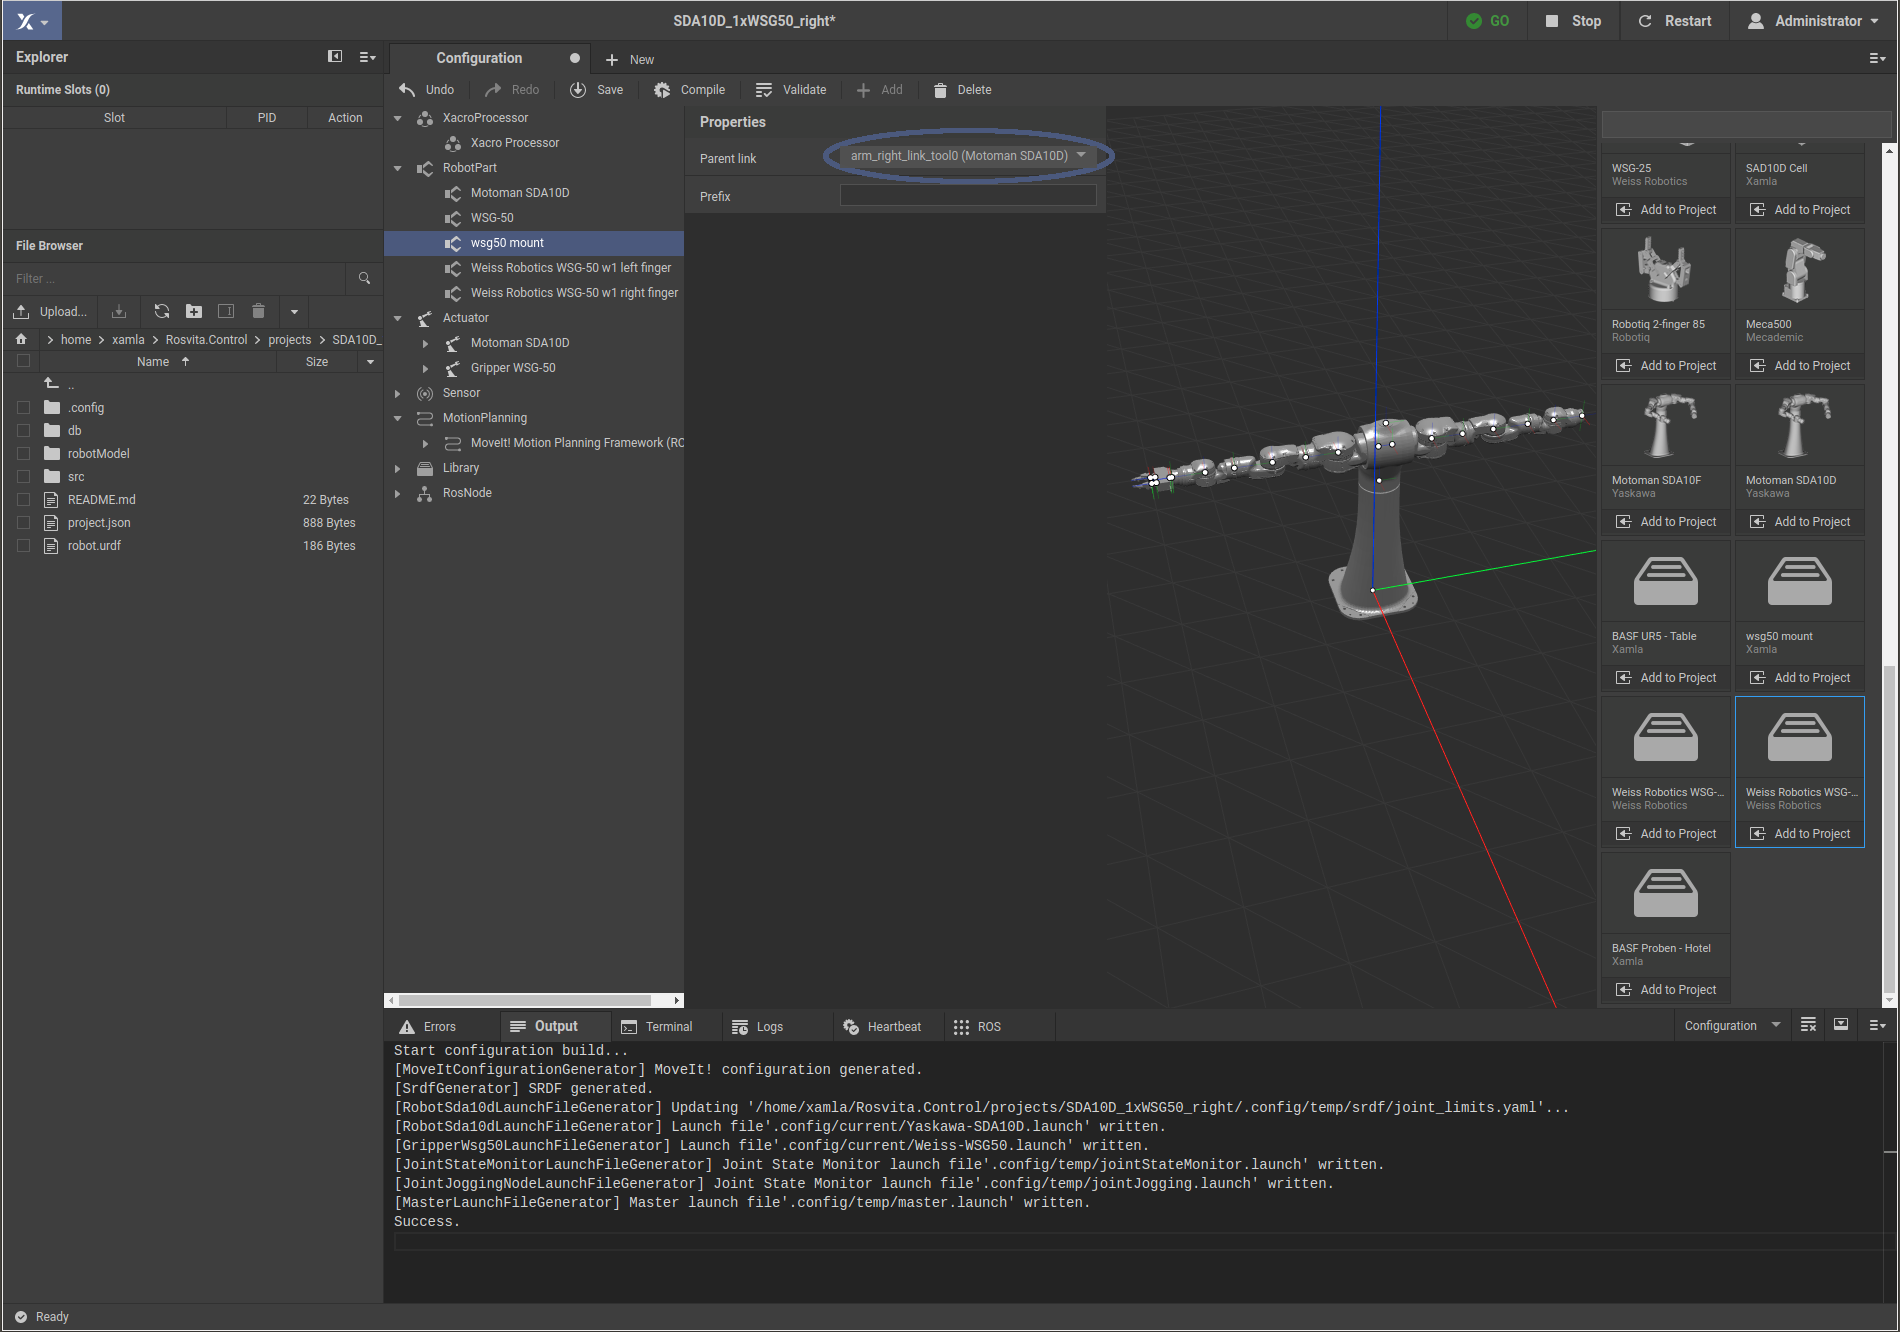
Figure 12.1 Setting of a parent link in the properties list of a robot part.
Overall, the following robot parts with the following parent links are needed to e.g. connect the Weiss Robotics WSG-50 gripper with custom mount and fingers to the right arm of the Yaskawa Motoman SDA10D:
Yaskawa Motoman SDA10D;
Parent link: worldwsg50 mount;
Parent link: arm_right_link_tool0 (Yaskawa Motoman SDA10D)Weiss Robotics WSG-50;
Parent link: mount_tool0 (wsg50 mount)Weiss Robotics WSG-50 w1 right finger;
Parent link: gripper_right_tool0 (Weiss Robotics WSG-50)Weiss Robotics WSG-50 w1 left finger;
Parent link: gripper_left_tool0 (Weiss Robotics WSG-50)
In addition, the following actuators are needed:
Motoman SDA10D (Yaskawa)
Gripper WSG-50 (Weiss Robotics)
After pressing the Compile button, the robot with gripper should appear in the 3D view of the Configuration window.
Usage of identical robot parts (distinction via prefix):
If several same robot parts shall be added to the scene (for example, two WSG-50 grippers), they must be distinguished by Prefix. Thereto, simply use the Prefix field in the Properties list for the corresponding robot part and actuator.
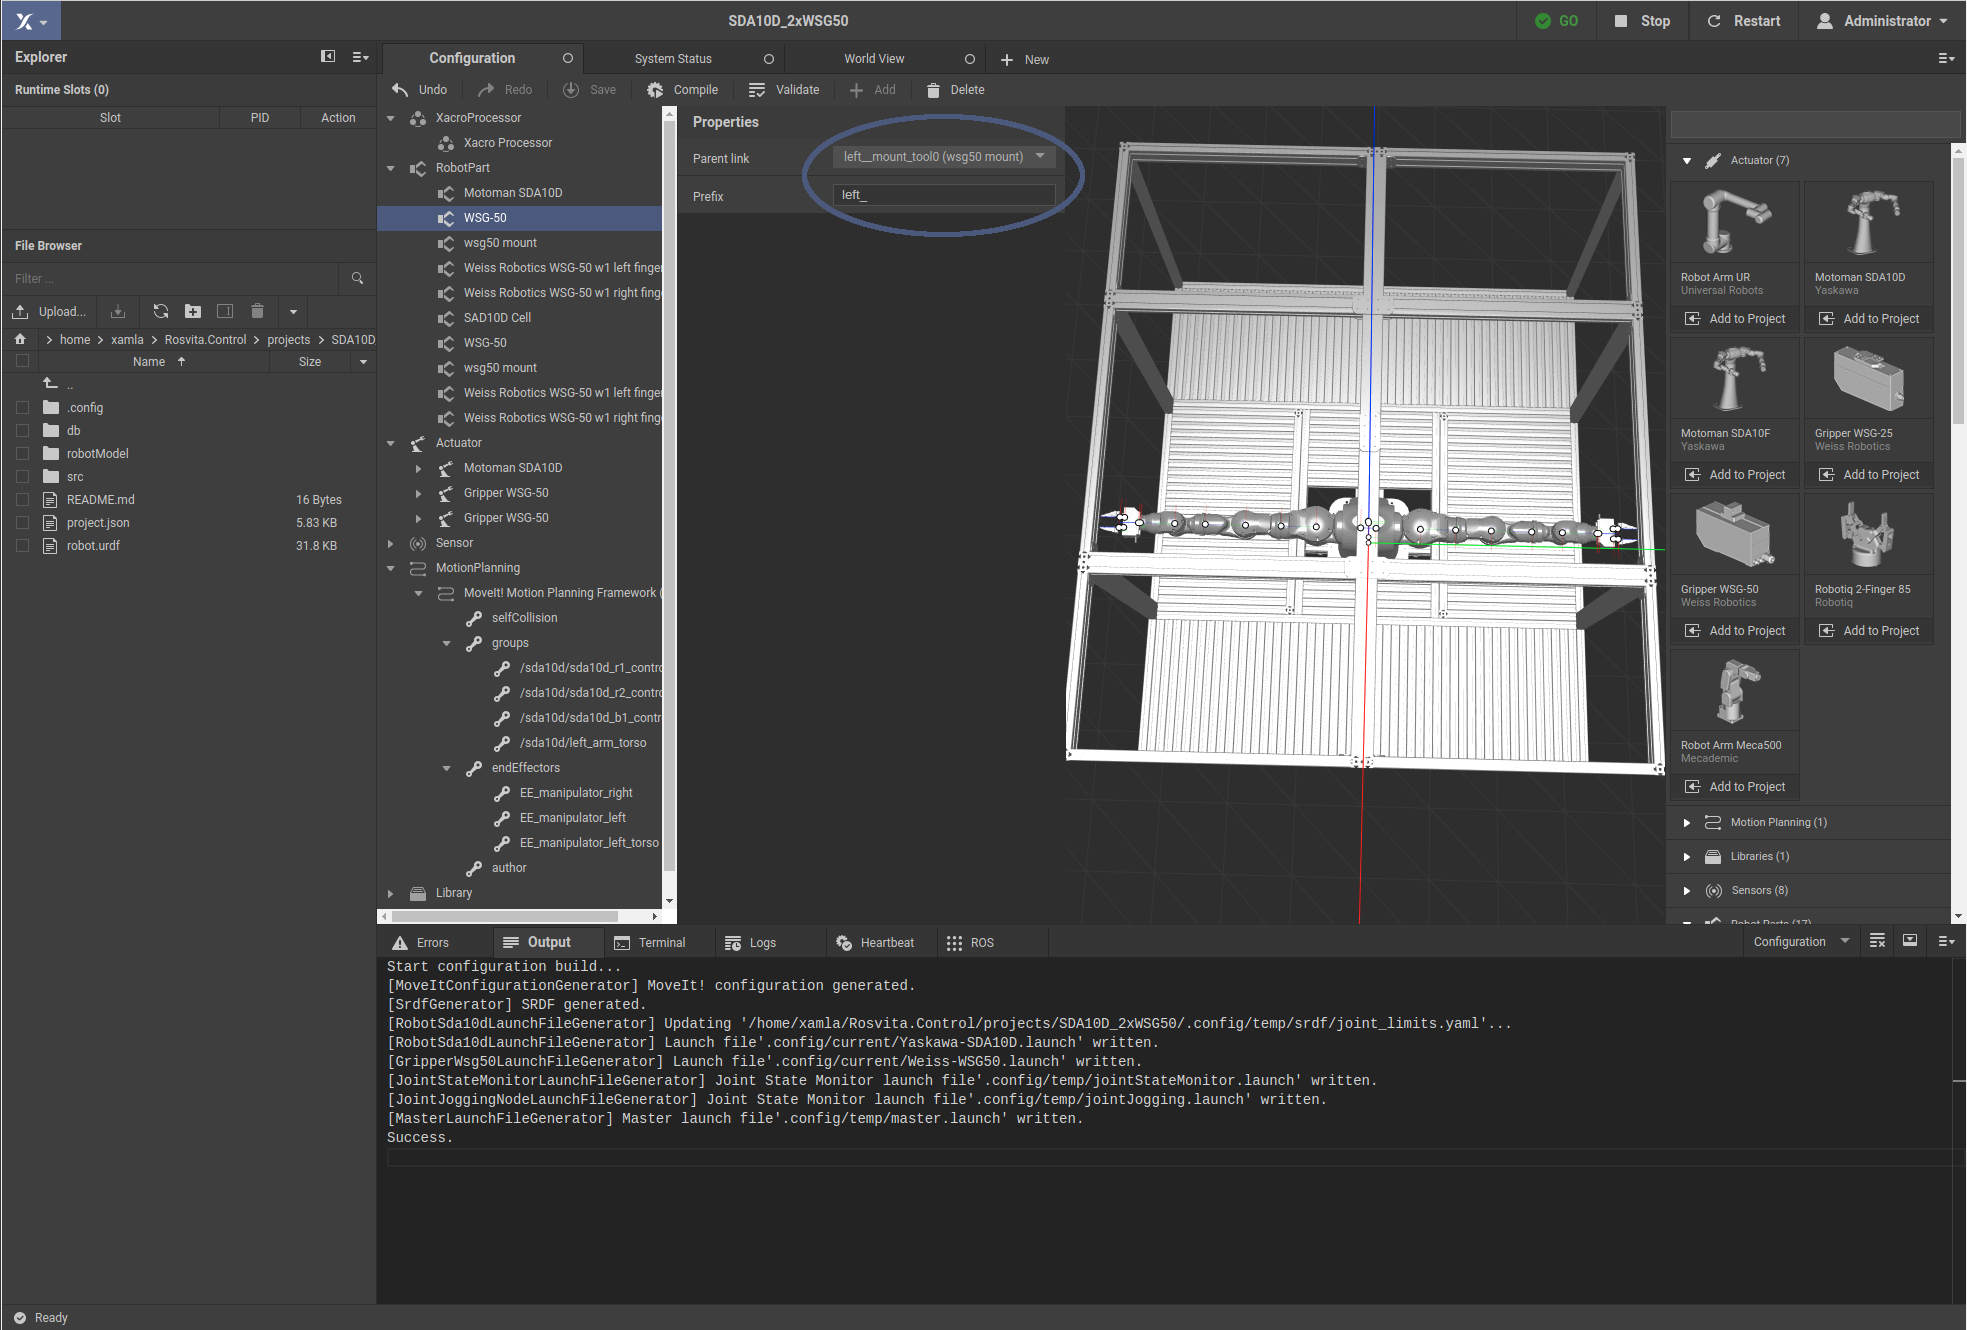
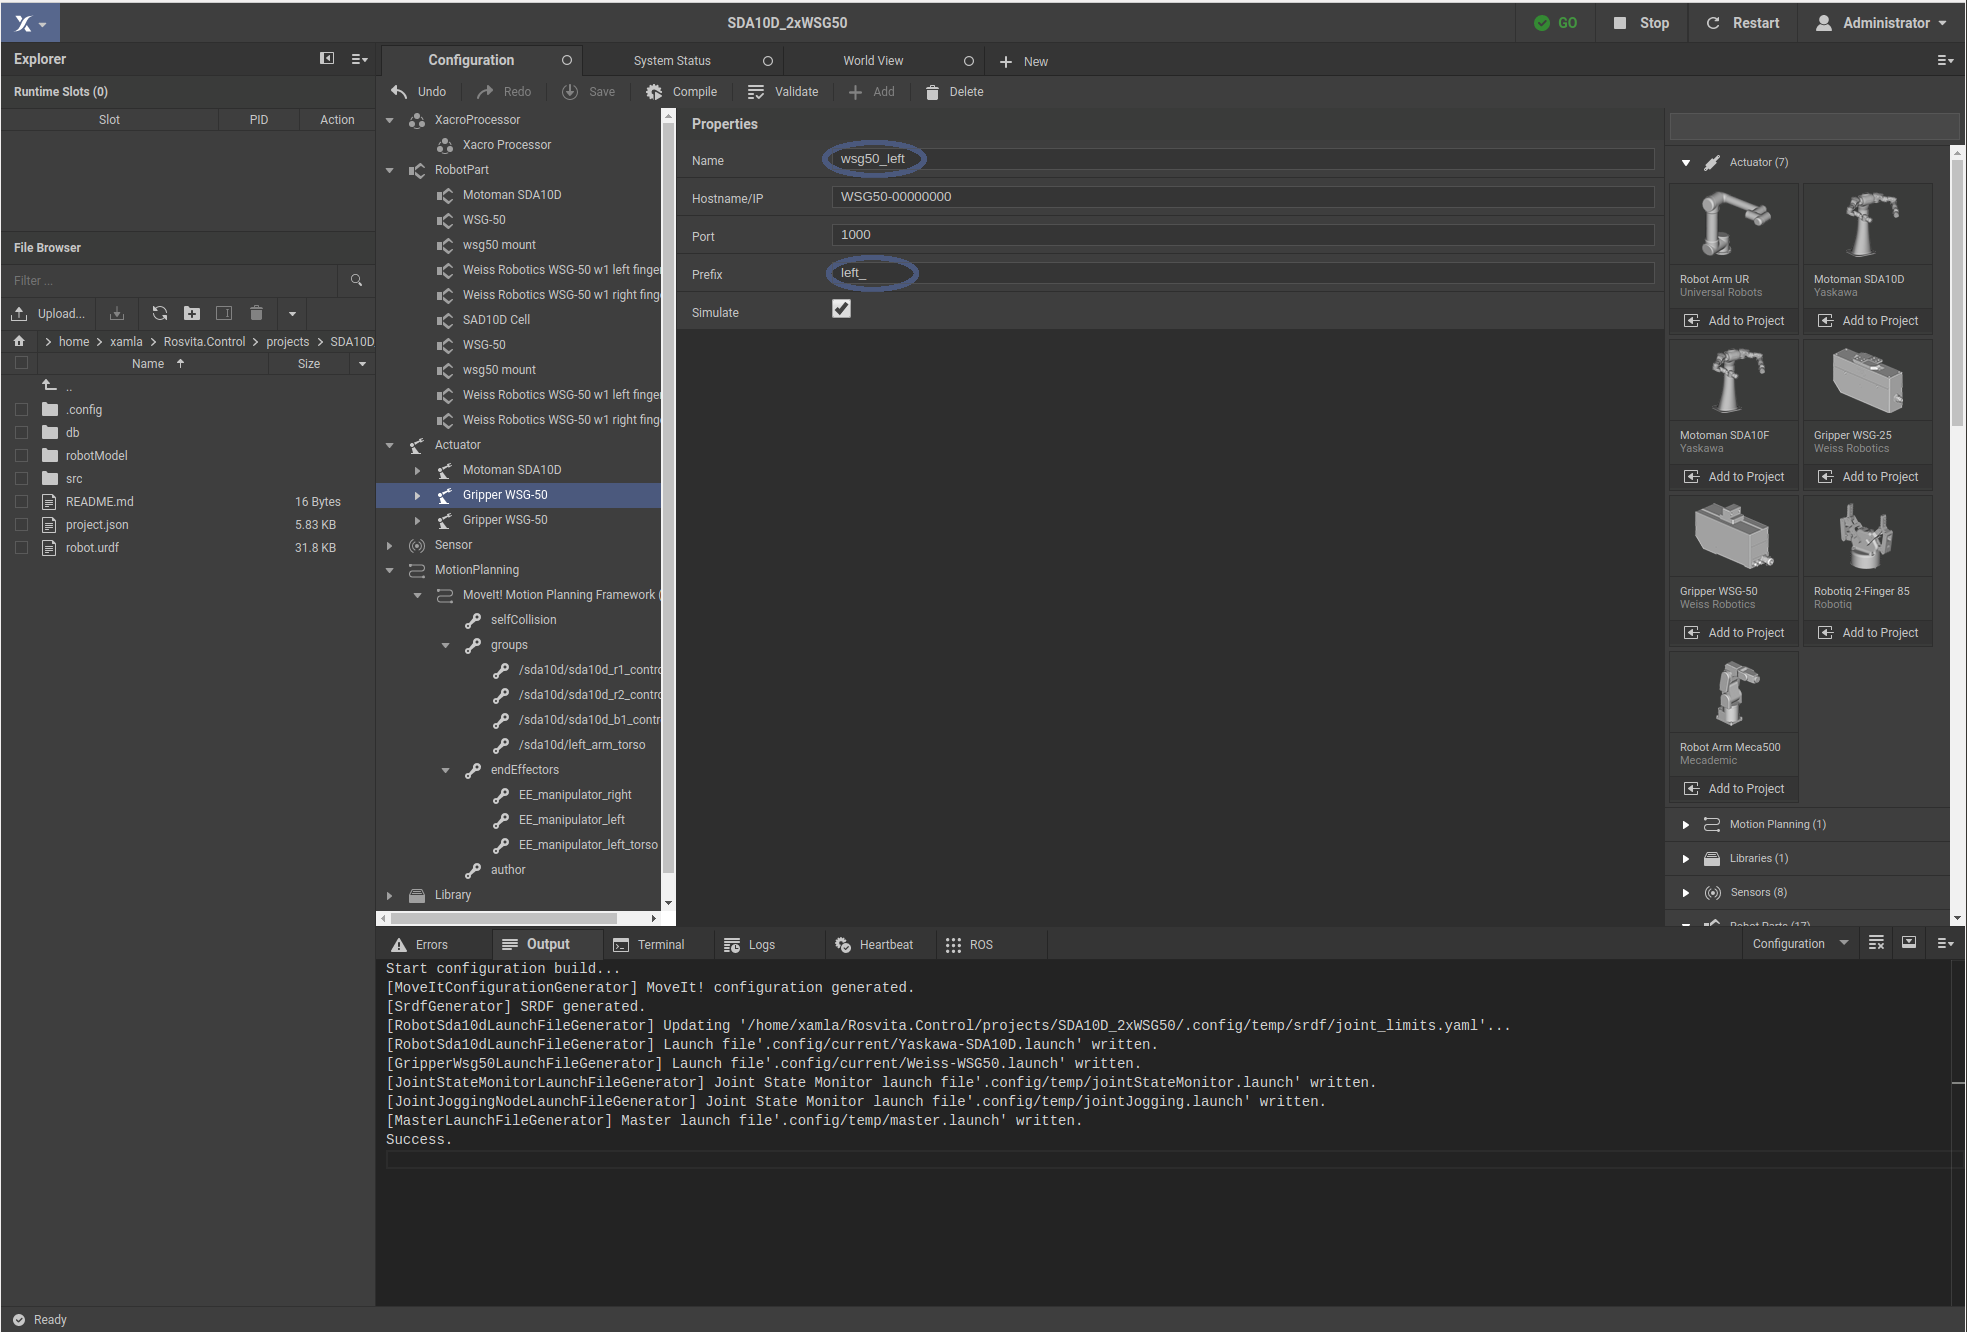
Figures 12.2 and 12.3 Prefix usage for e.g. two WSG-50 grippers.
If two identical robot arms shall be added to the scene (e.g. two UR5 robot arms), in addition to the distinction by Prefix, a second move group and a second end effector for this move group have to be created. This can be done by using the + Add button in the top bar of the configuration view (see Fig. 12.5).
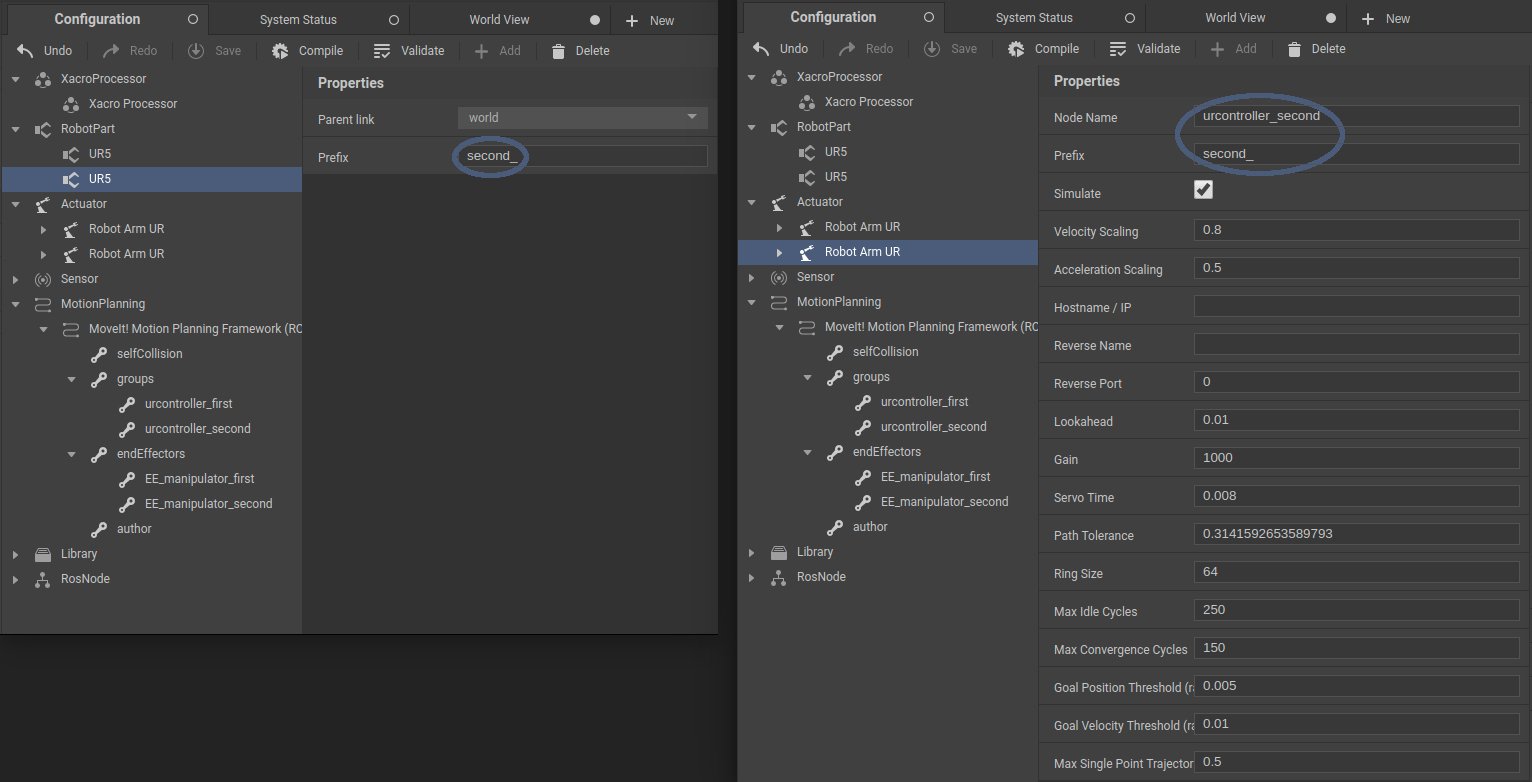
Figure 12.4 Prefix usage for e.g. two UR5 robot arms.
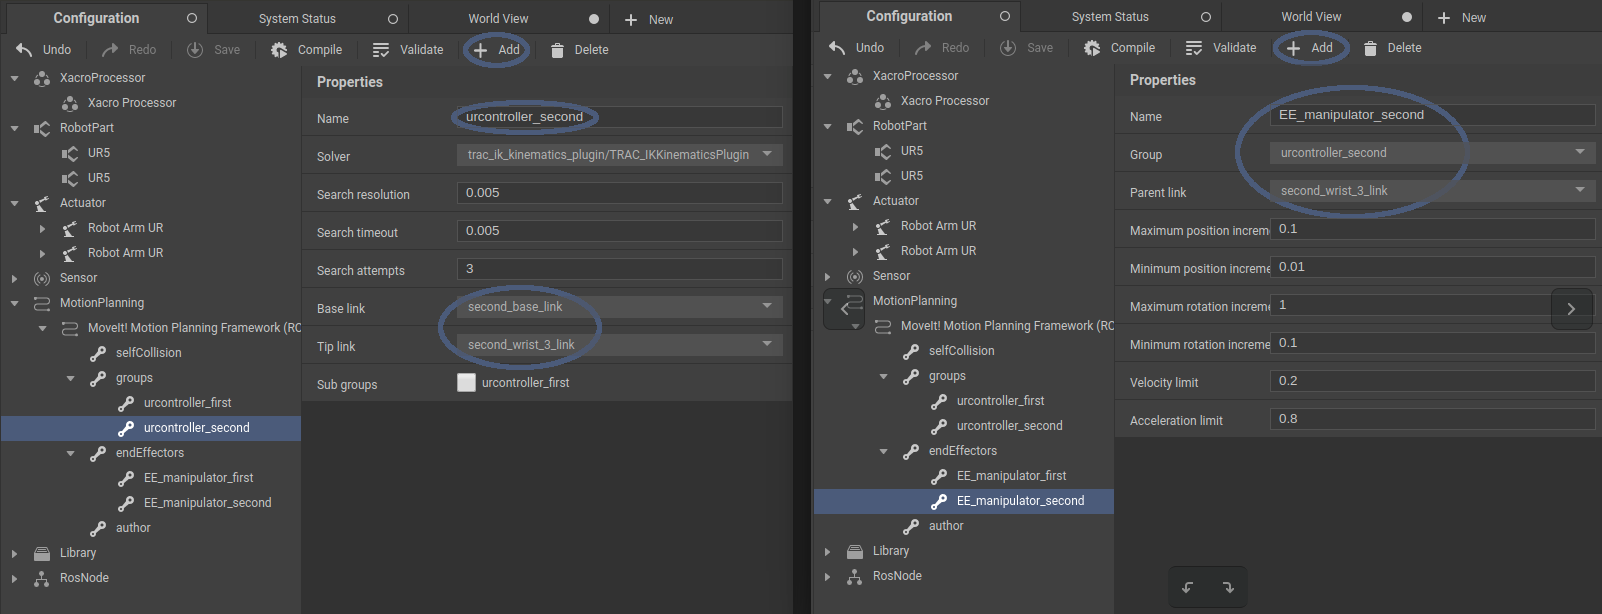
Figure 12.5 Addition of a second move group and end effector for the second UR5 robot arm.
Note
To be able to select the renamed links (e.g. second_base_link) in the Properties list of e.g. the second move group, the Compile button has to be pressed after the renaming. Moreover, to be able to select the second move group as group for e.g. the second end effector, again the Compile button has to be pressed first. Hence, for creating a configuration with two identical robot parts, the Compile button has to be pressed several times.
Configuring a real robot:
To configure a real robot, in the Actuator’s Properties list the Simulate checkmark has to be removed and instead, the IP address of the robot has to be entered (see Fig. 12.6).
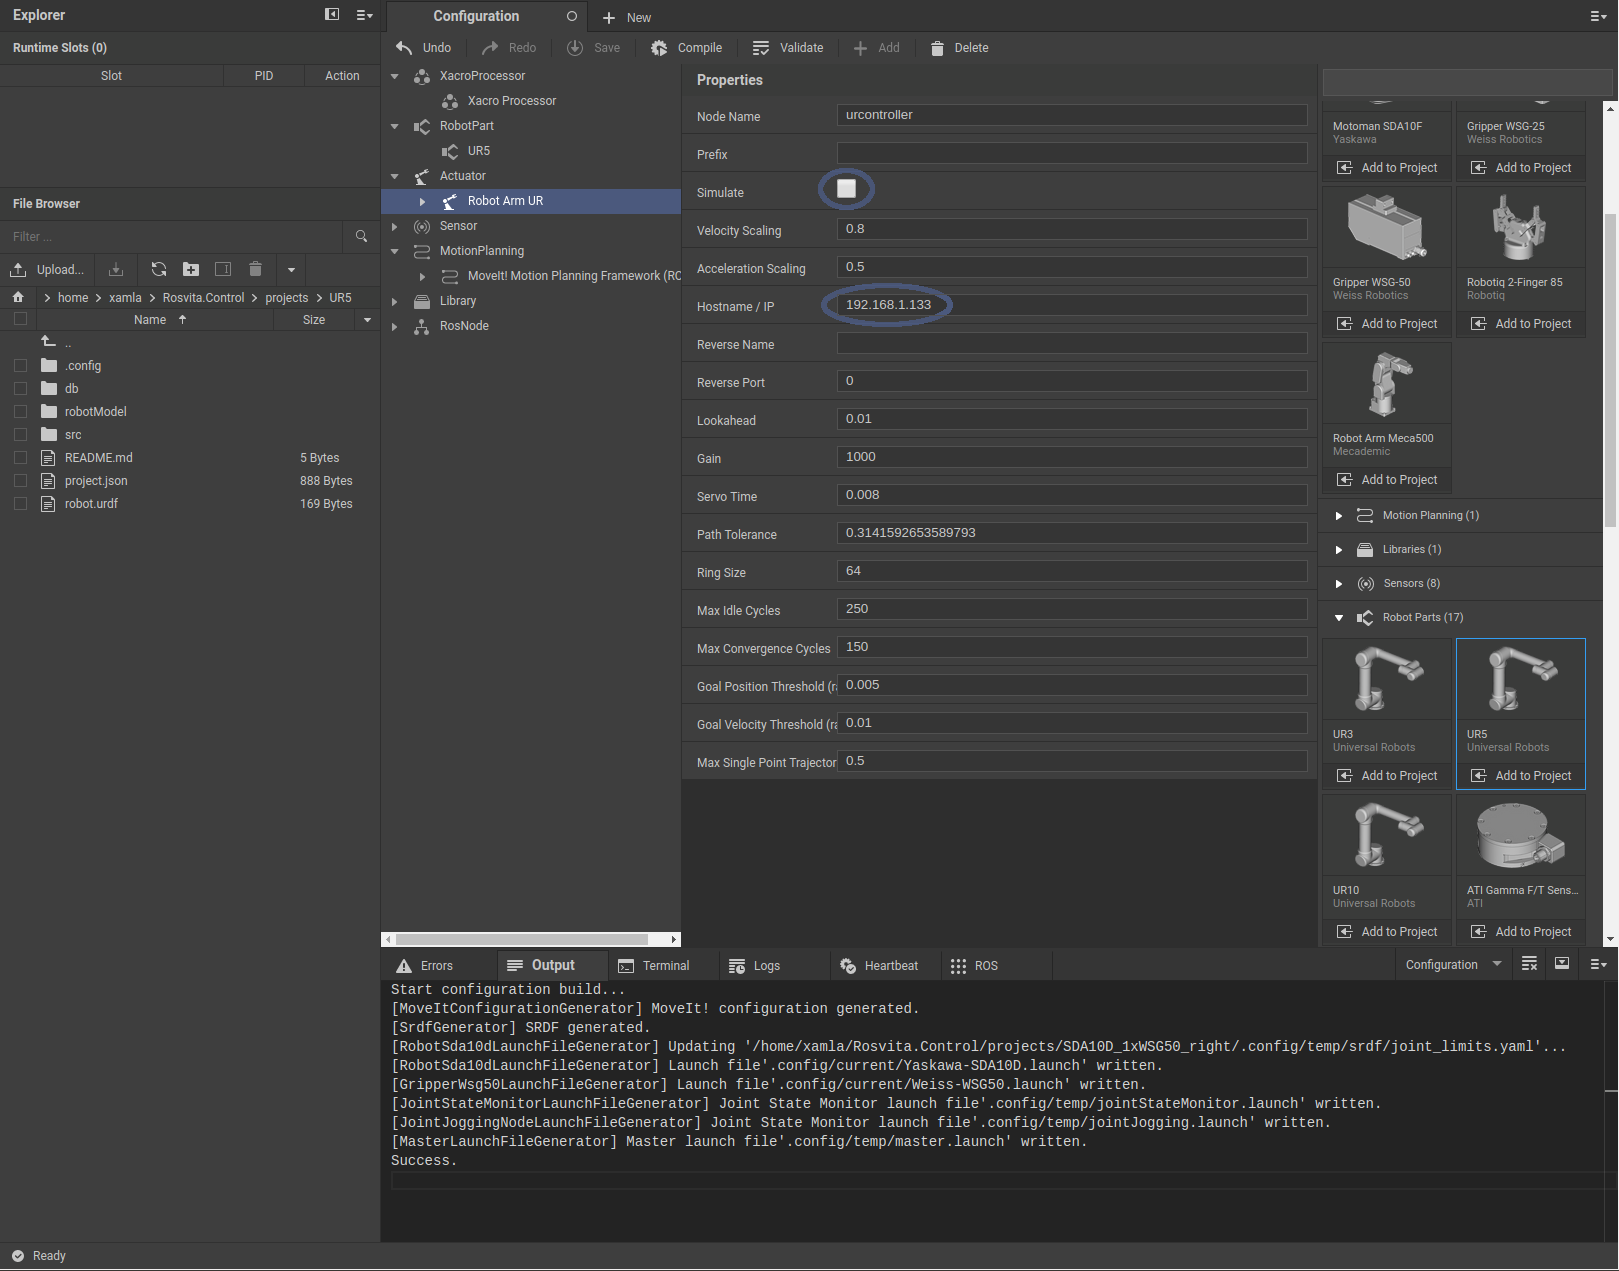
Figure 12.6 Configuration of a real robot. (The IP address must be changed to the IP of your robot.)
Note
All USB devices (e.g. cameras) have to be plugged in before starting ROSVITA.
… to be continued