Path Planning (“World View”)
Once the robot configuration is complete and all ROS nodes have been successfully launched (indicated by a green GO with a check mark at the top bar), path planning can begin. To do this, switch to the planning view by clicking on the blue-highlighted Xamla symbol and selecting the menu item World View. A 3D view opens showing the configured robot along with an interactive marker (movable coordinate system) at the tool center point (TCP) of the robot. Use the left mouse button to move and rotate the interactive marker. As a result, a semitransparent ghost of the robot will appear and follow the movements of the interactive marker. When the desired target pose is reached with the ghost, click on the Plan button at the top bar and a white path from the start pose to the target pose will appear (see Fig. 4.1).
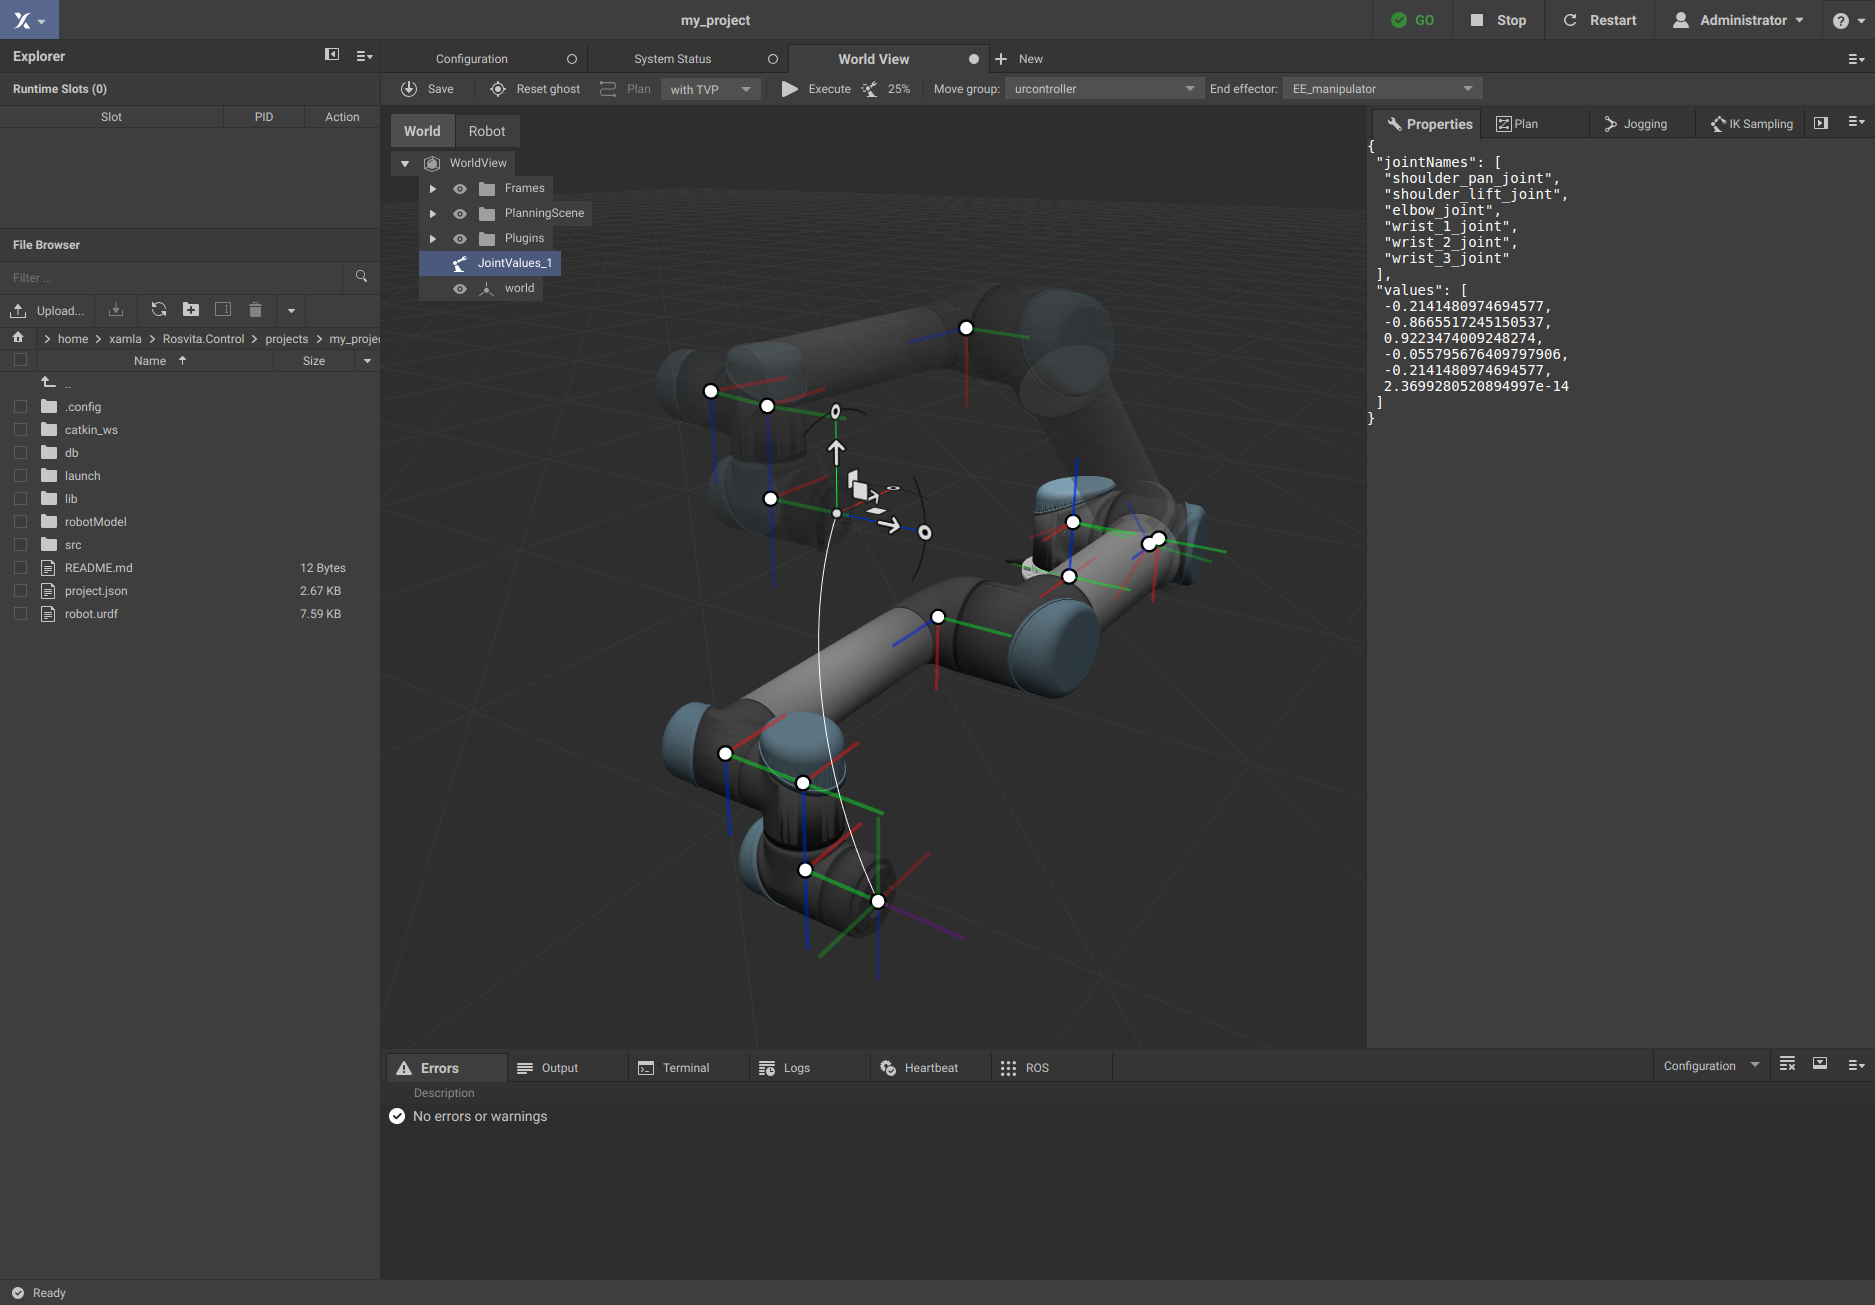
Figure 4.1 World view with path planning for robot arm UR5.
Note
Path planning can only be performed if the current robot configuration has been compiled and all ROS nodes have been successfully started (displayed by a green GO with check mark in the top bar)!
After clicking on the Execute field, the robot moves along the displayed path to the target pose (ghost and actual robot merge). If instead you click on the Reset ghost button, the ghost is moved back to the current pose of the robot. The ghost serves as preview of the target configuration of the robot. This allows to identify and avoid collisions in advance. Instead of directly moving the ghost, you can also move an additional interactive marker to a target pose. Thereto, double click into the scene and a second interactive marker will appear. Move this marker to the desired pose, click with the right mouse button into the scene and select the item Move Ghost To Pose Picker.
Next to the Plan button at the top bar, the path planner can be selected from a list (currently MoveIt! or TVP). TVP stands for Trapezoidal Velocity Profile, which is particularly suitable for time-critical problems without obstacles in the working area of the robot. MoveIt! is a complex motion planning framework with collision check (i.e. self-collision as well as collision with obstacles in the scene) and based on the open motion planning library OMPL . Furthermore you can select the Move group and the End effector at the top bar, which especially becomes interesting with several robot arms.
By right-clicking in the scene, the current joint values and pose of the robot, as well as a current joint trajectory and Cartesian path can be saved. Moreover, as mentioned before, the ghost can be moved to the second interactive marker (called pose picker), collision objects can be added to the scene and the active cursor (i.e. the currently chosen interactive marker) can be rotated. Saved joint values, poses, joint trajectories and collision objects appear in a list displayed on the left side of the World View. If you click on one of these saved elements, more detailed information about the selected element (e.g. names and values for the joints) appears on the right of the World View. When selecting stored joint values, moreover the ghost automatically moves to the corresponding location.
Note
To save the stored joint values and poses permanently, the World View has to be saved by pressing the Save button at the top bar. Thereby, the joint values and poses are written to the project folder into db/worldview.json.